How to make your own Halloween Mini Bunting
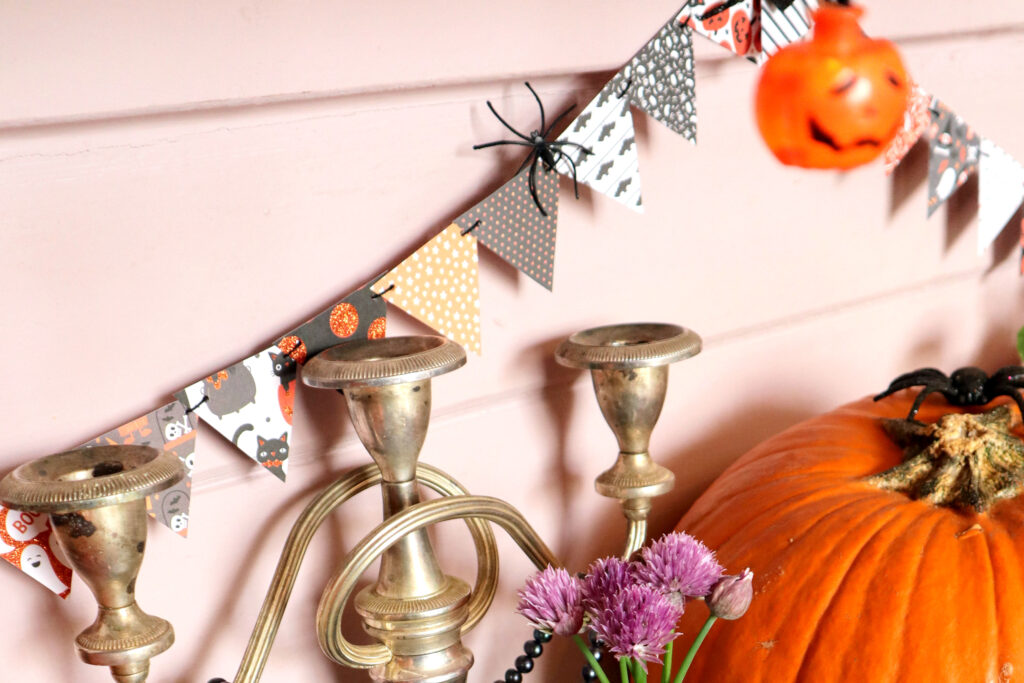
I made this Halloween Mini Bunting for Halloween 2020, but I reuse it every year. Mini bunting is just so wholesome and adorable, it makes me smile every time I see it. I’d love to see more mini bunting in the world! Maybe you can help make my dream come true?
Read on to find out how to make your own Halloween mini bunting.
If you don’t want to to go to the hassle of making your own mini bunting from scratch, I’ve got you covered! I have a whole bunch of Halloween Mini Bunting printables available in my Etsy Store. Please note, they are only available during Spooky Season. You won’t find them if you’re looking at other times of the year.
Materials

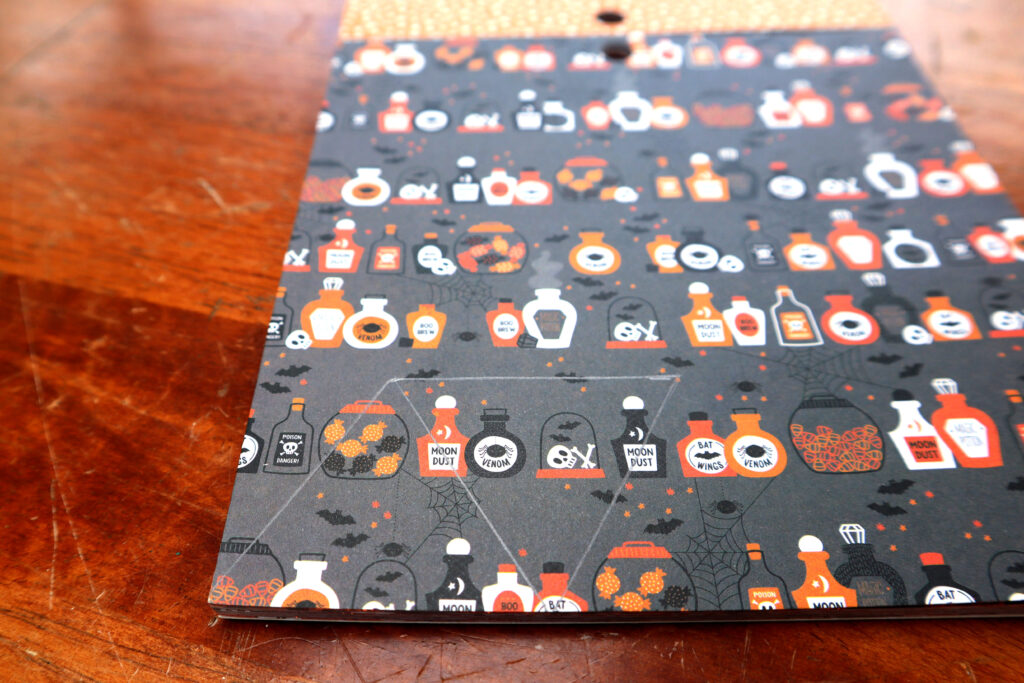
6 x 6 in double-sided Halloween scrapbooking paper paper pad. I used Die Cuts With a View – Boo Ya! from Spotlight (that’s Australia’s major craft and fabric store for overseas readers). I used just over a quarter of the pad and made two strands of mini bunting, about 2 metres/yards long each + extra for tying up.
String, twine, ribbon, yarn or similar to thread your bunting on. For sustainability bonus points, use or repurpose something you already have or thrift something, and/or use a natural fibre (like unbleached cotton string, wool, hemp twine, raffia, etc) which can be reused or composted at the end of its lifespan. I used thrifted cotton string I bought a few years ago, so I get double points!
3mm round hole punch or tailors awl
Paper scissors
Tapestry needle
Small piece of recycled cardboard
Make your Halloween Mini bunting
Measure the space and make your triangle template
You want to make sure your bunting is the right size for the space where you want to hang it. Too long is usually fine, but too short is not ideal, because you will have to cut a new longer piece of string and rethread everything.
Roughly measure the width of the space where you want your bunting to hang. You can do this by grabbing your ball of cotton string and draping it over the space. Make sure to drape it rather than holding it tight. Bunting looks really weird with no drape!
Once you know the length you want your Halloween Mini Bunting, add about a metre/yard extra on to each end to leave room for tying them up. This will give you the measurement you need to cut your string to a workable length. So draped length + (2 x 1 metre/yard)
I used an equilateral triangle stencil (5cm/2in on each side) I kept from my highschool maths days (you could also print or freehand draw one) to make a triangle template. Which I drew on a bit of recycled cardboard box and then cut out (see picture above).
Mark and cut out your Halloween Mini Bunting Triangles
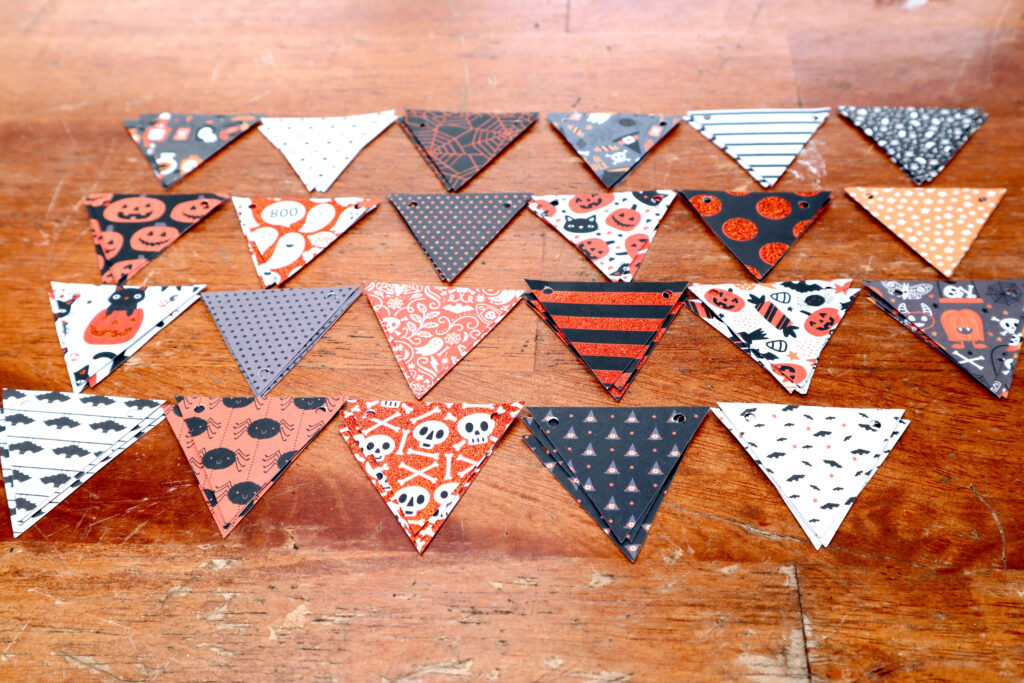
Trace your triangle template repeatedly onto one sheet of each pattern of scrapbooking paper, starting in one of the bottom corners, as shown. Alternate between having the triangle pointing up, then down, but not sideways. Never sideways!
If your triangle is pointing sideways, the pattern will be sideways when hanging. Mark out a row or two of alternating triangles on each sheet and cut them all out. You can always make more later if you need to.
Half the triangles will have the pattern the right way up, half will be upside down. This is usually fine because most double-sided scrapbooking paper has the major directional pattern on the front and the minor non-directional pattern on the back. Just put all the right-direction triangles in a pile and flip all the wrong-direction ones over. The back now becomes the front.
You can use single sided paper, but you end up with a lot more wastage, which is why I use double sided. It’s also better because you can use it outdoors (undercover or in dry weather only obviously) or across doorways and windows etc, and see the pattern on both sides. There may possibly be some patterns upside down, but it’s better than looking at plain white bunting! How sad would that be??
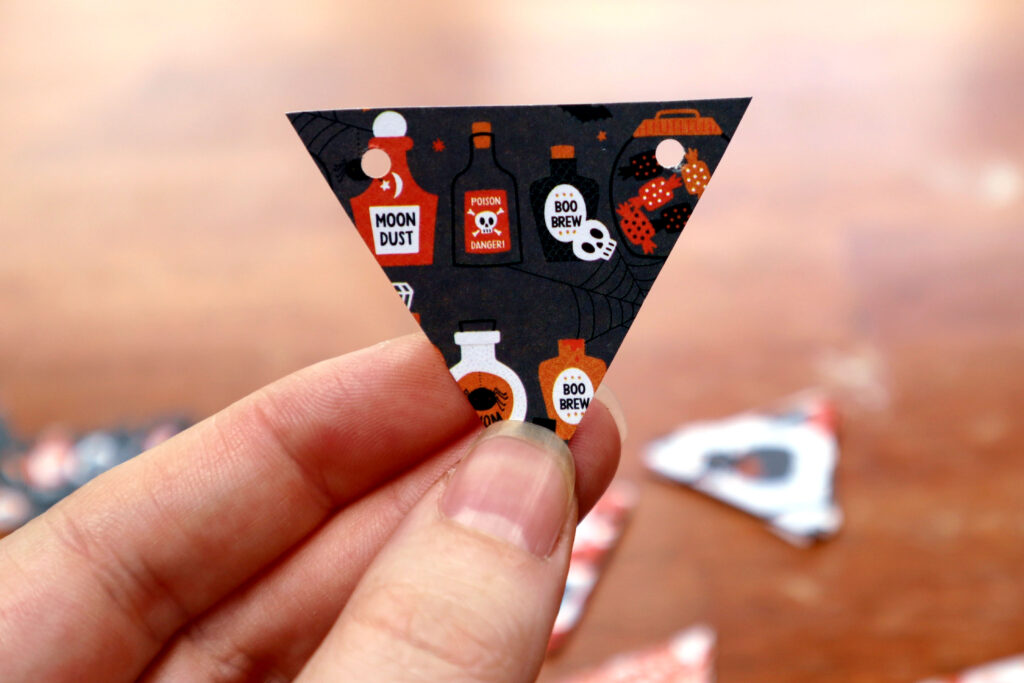
Punch the holes in your Halloween Mini Bunting triangles
I have a 3mm hole punch now, but I didn’t when I made the first strand of bunting in 2020. Instead I used my tailor’s awl to pierce holes in the two top corners of each triangle, then widen the hole enough to thread them and push them along the string. You could also use a craft knife and cutting mat to cut a small x in each corner.
Both these options are a bit laborious though, and they make it harder to thread the bunting triangles. I do recommend investing in a 3mm punch if you can afford it. They come in handly for lots of things, but are especially good for making bunting and garlands.
Make sure you don’t punch your holes too close to the corner, or they might tear. A good rule of thumb is to leave a solid edge which is at least the width of the hole or wider.
After punching the holes, organise the triangles into their separate piles. Arrange the piles in a pattern you like, then just repeat the pattern as you thread your triangles. A random order is also cool though. It gives more of a wonky, unsettling vibe, which is perfect for Halloween!
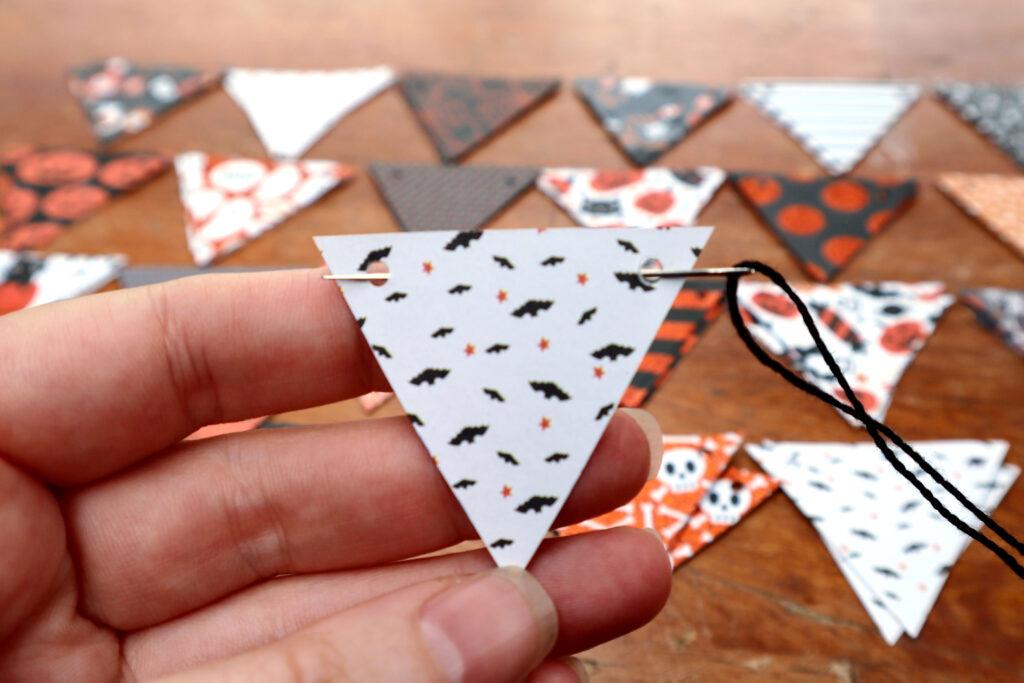
Thread your Halloween Mini Bunting triangles
Use your string, twine etc, to thread them. The easiest way is to pass the thread through the eye of a large tapestry needle and use the needle to thread them. You can also use sticky tape to tape the end if you don’t have a needle and your string starts fraying.
Thread the triangles on in your chosen order until it is the length you want. If you’re using yarn or thicker twine without a needle, it helps to wrap sticky tape around the ends so they don’t fray from all the threading.
The threading process is strangely therapeutic and is also a great hand-eye coordination exercise, especially for kids.
When you have roughly the length you want, test your bunting in place to make sure it looks how you want it to, and add or remove triangles if necessary. make sure they’re evenly spaced and have a little bit of wiggle room between them. My triangles were not inclined to fall off the string, but if yours are, just tie a big enough knot at each end to stop them slipping off, and you’re good to hang that baby up!

To see more pics of my bunting in action and to read my ultimate guide to sustainable halloween decorations, click here.
Store your Halloween Mini Bunting
For bonus sustainability points, when you take down your bunting after Halloween, wrap it carefully around a scrap piece of recycled card or cardboard and use the strings to tie it down, then pop it into a brown paper bag and fold the top over. This will keep your bunting clean and organised, ready to use next year.
Other ideas for making Halloween Mini Bunting
This is a really easy and accessible DIY, which would also be really fun to do with kids. You could also cut out triangles of plain coloured paper (black, orange, purple, green and white are the obvious choices, but don’t be afraid to experiment!) and get the kids to paint or draw little pictures on them.
Or get younger kids to paint/fingerpaint pieces of paper or newspaper with random patterns in Halloween colours and cut them up. Another fun option would be to make some veggie stamps in Halloween shapes and use paint to stamp them on plain paper.
You can use any kind of paper to make bunting – I used salvaged vintage sheet music, brown craft paper and scrapbooking paper to make two different types of bunting for our wedding reception. And yes, one of them was mini (and heart shaped). I’ll be sharing some of the DIYs I made for the wedding in a future post.
I only used about a quarter of the Halloween scrapbooking paper pad I bought, and the string was thrifted, so this project probably only cost a couple of dollars in total. It took a few hours to make.
I hope this gives you some useful ideas and inspiration for making your own Halloween mini bunting. Or any kind of mini bunting for that matter. Let’s all make mini bunting!
Obviously, I’d love to see your mini bunting makes! Snap a pic or two and tag me @maddythemaker on Instagram.
Happy mini bunting making!
[optin-monster-inline slug=”qdfs5cowsxbtmmucnrtm”]