How to make your own Vintage Halloween Table Runner

I designed and made this Vintage Halloween Table Runner in 2020 and I use it every year. I feel like it gives a richness and depth to my Halloween displays. It has such fun vintage details like the curved pointed ends and bobble fringe.
I’m not going to tell you exactly how you should make this, specify exact materials, or supply a pattern. This is because I want you to make it your own, and customise it any way you like! (I may make a pdf pattern in future.) I will tell you how I made mine though, and I hope it will inspire you to make your own.
I didn’t take many photos when I made it (sorry for the visually boring post!) and I won’t go into minute detail with the sewing instructions either. As long as you have basic maths and sewing skills, you should be able to follow along.
Materials and equipment for a 120 x 25cm [47 1/2 x 10in] Vintage Halloween Table Runner
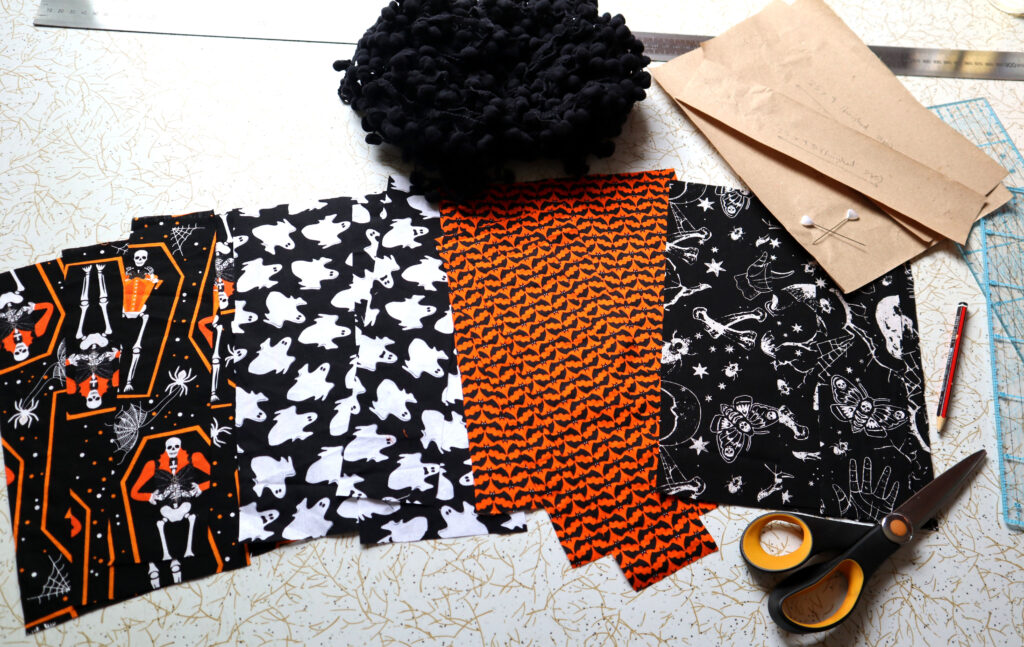
Around 1/2 metre/yard each of 4 different Halloween print cotton fabrics. You won’t use all of this, so if you have remnants, this is the perfect project to use them up! I used assorted Halloween fabrics from Spotlight and stuck to a classic black/white/orange scheme, but do whatever you like.
Around 1 metre/yard plain backing fabric. It works best if the colour matches your fabric – I used a black twill remnant. For bonus sustainability points, use a remnant or use/repurpose something you already have.
Optional – around 3 metres [3.5 yards] of matching or contrasting trim of your choice. I used black Bobble Fringe from my stash.
Sewing machine and thread
Recycled brown craft paper (newspaper or baking paper works fine too)
Pencil/pen/tailors chalk
Ruler
Tape measure
Paper scissors
Fabric scissors
Iron
Hand sewing needle and thread
I also used my quilting rulers for my topper patterns (you don’t need them, they just make the job a little easier)
How I went about it…
Figure out what size to make the Vintage Halloween Table Runner
First I measured the space where I wanted to put the runner. The length of my thrifted 60s buffet is 140cm [55in]. I didn’t want the runner to go all the way across. Although you could easily make it do that, or make it longer to drape down each side.
I used my metal tape measure to measure out the coverage I wanted, which was 120cm [47 ¼ in] long by 25cm [10in] wide.
Make the paper patterns for your Vintage Halloween Table Runner
Backing Piece
I used my metre long metal dressmaking ruler to measure out a rectangle on the trusty recycled brown craft paper I always use for pattern making.
I made my backing pattern 122cm [48in] long (giving 1cm [½ in] seam allowance on each edge) and 27cm [10 ¾ in] wide (also giving 1cm [½ in] seam allowance on each edge).
I made a full size paper pattern for the backing piece. You can make only half the pattern if you like, just remember to cut on the fold in the middle. This might be easier for you if you don’t have a long ruler.

You can always leave your runner a rectangle shape, or you could also make diamond or rounded ends. I wanted a curved point at each end to give it a vintage vibe, so I folded it in half lengthwise. Then I folded it again to give the correct midpoint.
I used a side plate and pencil to mark the curve, and cut along it, through all 4 layers of paper.
Topper Pieces
For the topper, I wanted a random, wonky kind of vibe, so I used three different widths and four different prints for the pieces. The three widths I chose were 18cm [7in], 9cm [3 ½ in] and 4.5cm [1 ¾ in]. Effectively giving full size, half size and quarter size pieces.
To make my paper patterns, I measured out rectangles of 20 x 27cm [8in x 10 ¾ in], 11 x 27cm [4 ½ x 10 3/4 in], and 6.5 x 27cm [2 ½ x 10 ¾ in] (finished measurements plus 1cm [½ in] allowance on each edge), then cut them out.
This was just how I decided to do it, you could use equal size pieces or quilt smaller squares. Or even just use one fabric if you’re short on time (just use your paper backing template again).
Pro tip: when combining different patterns, it’s usually recommended to stick to a limited colour palette (I used the classic black, white and orange because I want to be able to reuse it every year). This stops things from becoming overwhelming visually.
It’s also generally recommended to use differently scaled patterns. The skeletons are large scale, the occult is medium, the ghosts are small, and the bats are tiny. This helps to create contrast and stop everything blending in with everything else.
However, this is just a guide! I don’t really believe in “design rules”, whatever feels right for you, is right for you.
Cut out the fabric pieces for the Vintage Halloween Table Runner
I used a plain black twill remnant I had leftover from another project for the backing. The remnant was too short to make one continuous piece. So I just cut two pieces and sewed them right sides together. Then I opened them out and ironed the seam flat.
After joining my backing fabric sections together, I pinned the backing pattern on top, and cut around the edges.
Once I had my paper topper patterns cut out, I pinned them to my fabric, and cut out one of each size, for each print. This gave me exactly the right amount of pieces, but if for some reason you’re short, just cut an extra piece. I bought a metre of each topper fabric but I only used a small amount of each for this project.
I laid out my pieces and arranged them in a “deliberately random” Jamie Oliver way, swapping pieces around until the composition appealed to me. There is no right or wrong way to do this! Just go with whatever works for you.
Sew the Vintage Halloween Table Runner pieces together
I sewed my topper pieces right sides together one at a time, to make sure I didn’t mess up my “random” order. But you could also just pin them all together first. When they were all joined, I ironed the seams flat.
I pinned my backing piece to the topper, with right sides together. I used the curved pointed ends from the backing piece as a guide to cut the topper to the same shape.
Using a 1cm [½ in] seam allowance, I sewed all the way around the edges, leaving a 10cm [4in] gap in one long edge for turning. After trimming the seam allowance and clipping the curves, I turned it right side out and ironed it flat. I pinned the opening in the seam closed, then topstitched the opening closed, close to the edge.
Attach trims to the edges of the Vintage Halloween Table Runner
I had the black bobble fringe in my stash and this seemed like the perfect opportunity to use it, because it went perfectly with the vintage vibe I was going for. You could also use other types of fringing, lace, thin ribbon, or leave the edging off entirely.
The amount you will need depends on the size of your runner, you can measure around the edges of your backing pattern to get the meterage/yardage needed.
Just add a bit extra to the measurement if you’re specifically buying trim, to make sure you will definitely have enough.
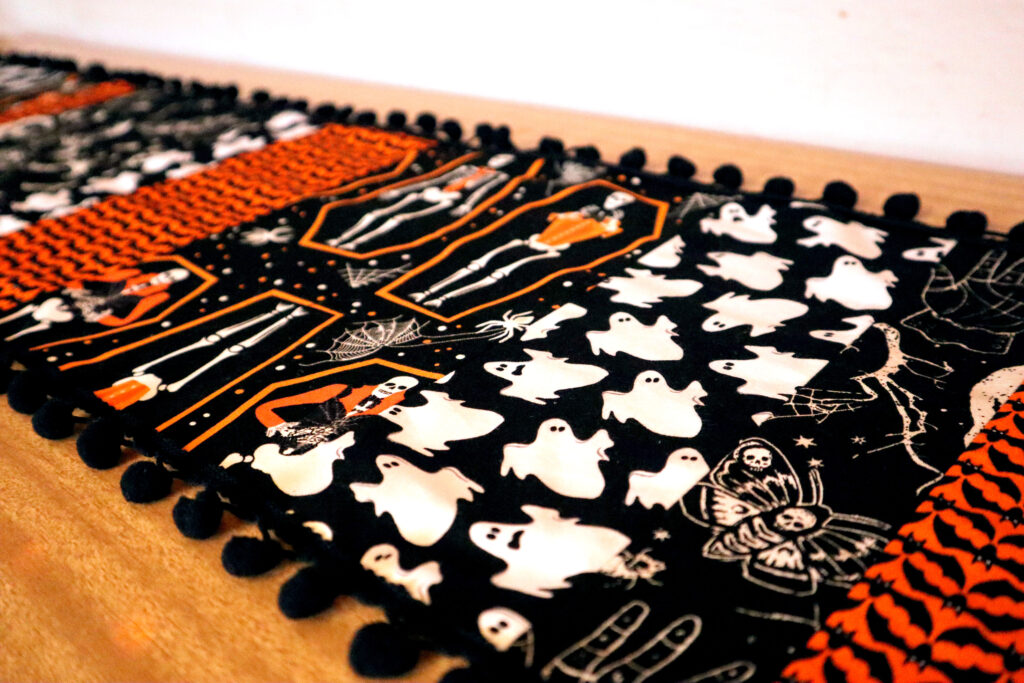
I pinned the bobble fringe around the edges and hand basted it in place, because sewing bobble fringe (especially with large size bobbles like this) is an absolute nightmare. It pulls all over the place. After basting the fringe I used a straight machine stitch to topstitch it down (I would use zigzag for wider trims).
I could have sewn the band of the fringe on the back side or inside as I was sewing the topper on, and just had the bobbles showing. I actually really liked the dark border effect though, so I just put it straight on top. Again there’s no right or wrong here, just do what you like.
Iron the Vintage Halloween Table Runner and enjoy!
I gave it a good iron…and I was done! Ready to use in my Halloween display…
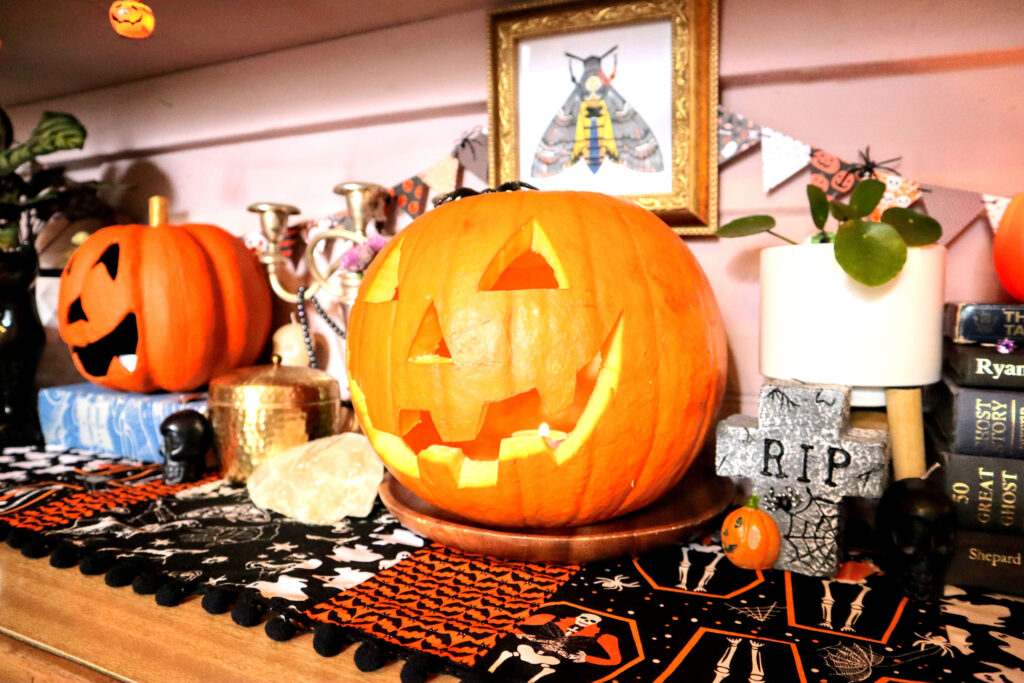
To see more pics of my runner in action and read my ultimate guide to sustainable Halloween decorations, click here.
The total cost in materials was probably about $20 including the bobble fringe, but I still have heaps of the fabric left. I used not even a quarter of each, so it was probably well under $10 in reality. It took a few hours to make.
I hope this gave you some useful ideas and inspiration for making your own Halloween runner.
I’d love to see your makes! Snap a pic or two of your Halloween runner and tag me @maddythemaker on Instagram.
Happy Halloween runner sewing!
[optin-monster-inline slug=”qdfs5cowsxbtmmucnrtm”]