How to make your own Sustainable Batty Halloween Garland
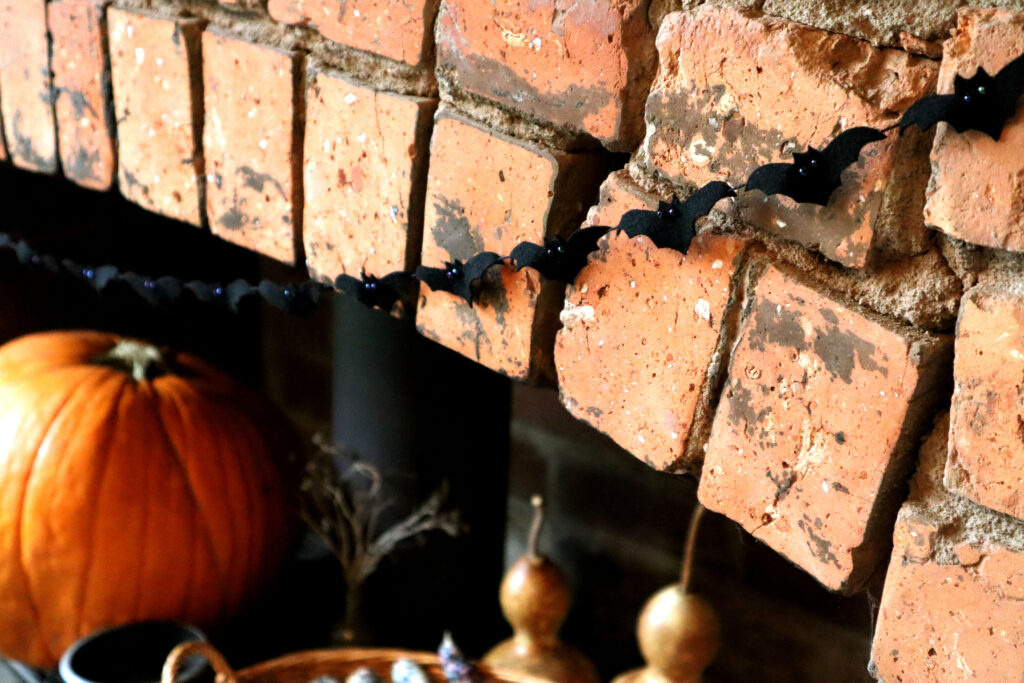
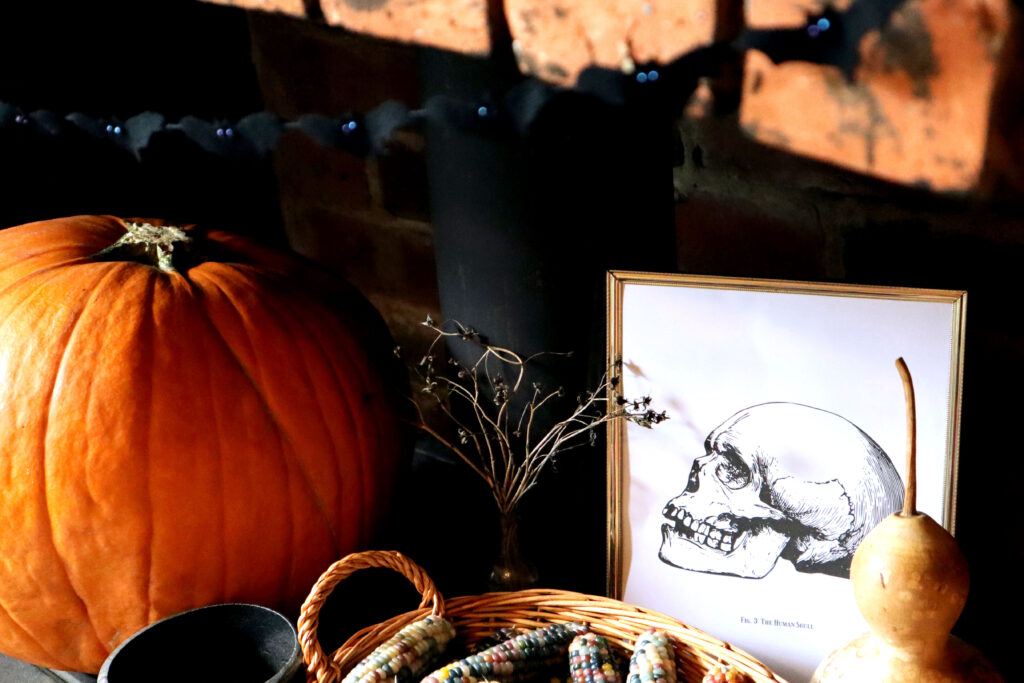
How cute is this Sustainable Batty Halloween garland I made for Halloween 2022??
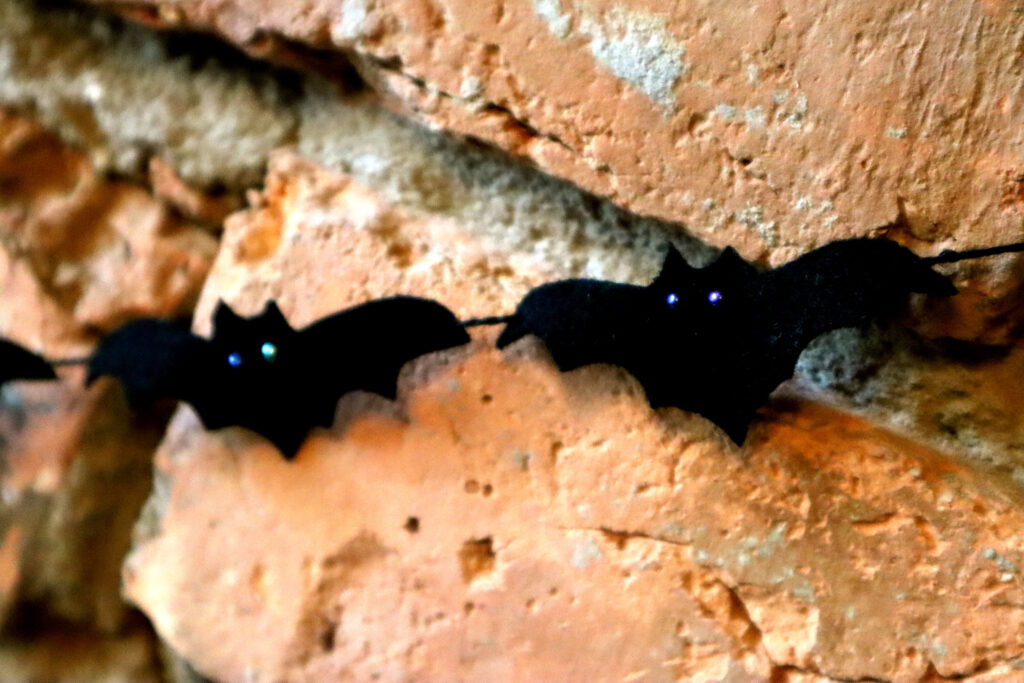
Look at those sparkly little eyes! I think I actually prefer when the camera won’t focus on them, because it shows up the iridescent eyes even better.
Would you like to make a Sustainable Batty Halloween Garland too? Read on to find out how to make one of your own!
What makes this a Sustainable Batty Halloween Garland?
The most sustainable part about this Halloween Garland, is that you should be able to make some version of it at home. Using materials you already have lying around.
These are the most sustainable materials you can possibly use, because you already own them.
You don’t need to buy anything new, which is always the most sustainable option in every situation. Putting the materials you have to use, is also more sustainable than not using them at all!
This Sustainable Batty Halloween Garland is made entirely of thrifted, upcyled, recycled, all natural materials. I already had the materials lying around, so it involved no shopping and cost me $0 to make. Decorating doesn’t get much more sustainable than that!
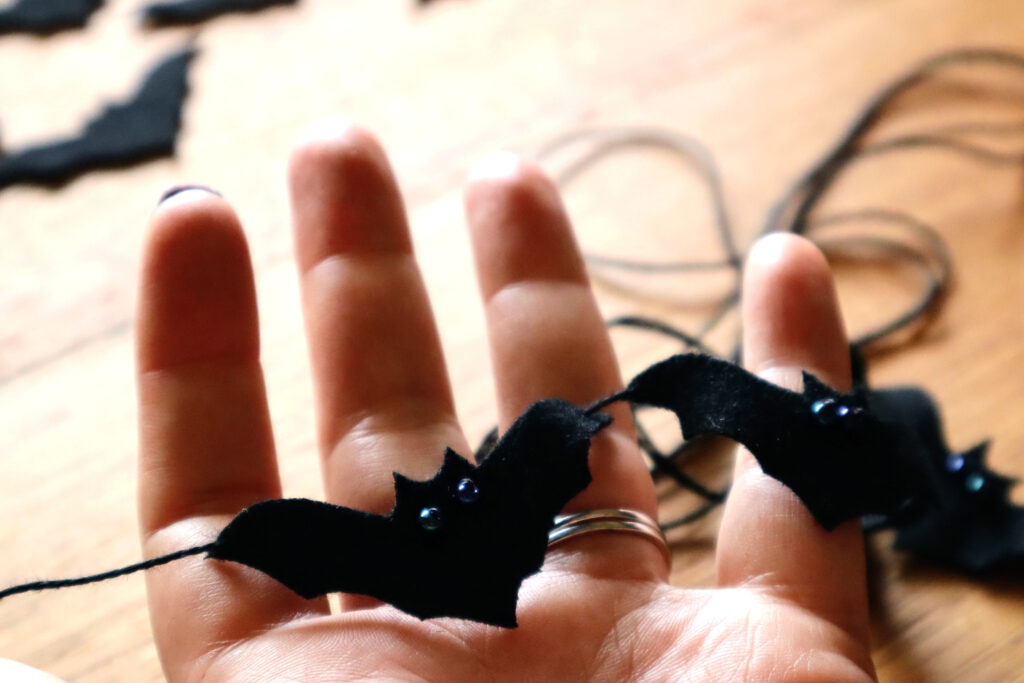
For the bats I used a scrap of wool felt from the facing of a pair of pants I cut out many years ago. I never got round to sewing them up and they would be too small for me now anyway.
I used thrifted black cotton string from my stash for the threading material.
For the bat’s eyes, I used iridescent glass seed beads I had left over from a necklace I made about 20 years ago.
I bet you also have some things lying around which could work for this project!
It doesn’t really matter what materials you use, but here are some suggestions:
Ideas for materials you can upcycle into a Sustainable Batty Halloween Garland
For the Bats
Felt
I’ve used wool felt to make my bats, and I probably wouldn’t recommend using any other type of fabric besides felt. Synthetic felt is fine if that’s all you have at home.
This is because the edges of woven fabrics will likely fray, and the edges of knitted fabrics will roll up. They may be ok for a season or two, but won’t last beyond that, which makes them unsustainable.
Leather or suede
You could upcycle some thin leather or suede, but be aware that cutting them can be a little tough on the hands.
I am working on rebuilding my wrist and hand strength (after years of severe chronic illness).
I do this with knitting, sewing, making jewellery, and other crafts like this. But I definitely wouldn’t be able to manage suede or leather for this project.
Only attempt leather or suede if you have very good scissors and strong hands. You may also need a leather punch to make holes for threading.
Rigid plastic
You could also use thin rigid plastic for your bats, if you have some. Maybe upcycled product containers or cracked (but clean) plant pots could work? You could make different colours out of different containers
Try to think outside the box. Remember: using plastic for your Halloween garland is still more sustainable than throwing out the plastic and buying something new!
Just be sure to consider the difficulty of cutting the plastic, the same advice I gave for suede/leather applies.
Paper or cardstock
Cardstock is by far the easiest option. If you don’t have any felt or other materials dagging around, you can easily use paper, cardstock or thin cardboard (this could be a fun activity with kids!).
Keep in mind that thicker paper or cardstock is more durable and will last many more seasons than thin paper will.
Also, be aware that thicker cardboard boxes can be hard to cut, especially when cutting small detailed multiples, like this project requires.
Cardstock or thin cardboard is the ideal balance between durability and ease of cutting, but you can probably make anything work if you have to!
You can always colour or paint plain recycled cardboard or cardstock too, so you can really get crazy with the colours and details.
For the thread
You can use cotton string/thick thread, wool, yarn, twine, ribbon, raffia etc to hang your garland, depending on the material you are using to make your bats.
Bear in mind that you will need thinner thread or string if you plan to sew your Batty Halloween Garland with needle and thread like I did.
If you made cardstock, leather or suede bats, you can use a hole punch and make holes big enough to thread thicker options like ribbon or twine. Just be careful not to punch your holes too close to the bat’s wingtips if using paper/card, or the paper may tear.
If you made plastic bats, you can use a heated metal pin, nail or skewer to melt holes for your threading material. Just be very careful. Use pliers to hold your metal implement if needed, wear safety gloves, mask and goggles, and work outside.
For the eyes
You can sew on seed bead eyes like I did, or you could use any other small embellishments, like other types of beads, sequins or diamontes (if you have them).
Just make sure that your beads or whatever you use have wide enough holes to accomodate a needle threaded with your chosen threading material.
When I was sewing mine, some of my seed beads fit over the needle and some didn’t! I couldn’t change the needle either, because a smaller one wouldn’t fit the thread I was using. Luckily I had enough seed beads which fitted.
You may want to check that you have enough which will actually fit, before you start sewing.
If your bats are made of paper or cardstock, you can add eyes in pretty much any way you like!
Feel free to draw or paint them on, or glue objects or embellishments on. If you’re drawing or painting them on, you could even add some vampire bat fangs!
Whatever you decide to do, try to get creative and use things you already have lying around. This will always be my #1 sustainable design tip!
Materials and equipment for a Sustainable Batty Halloween Garland
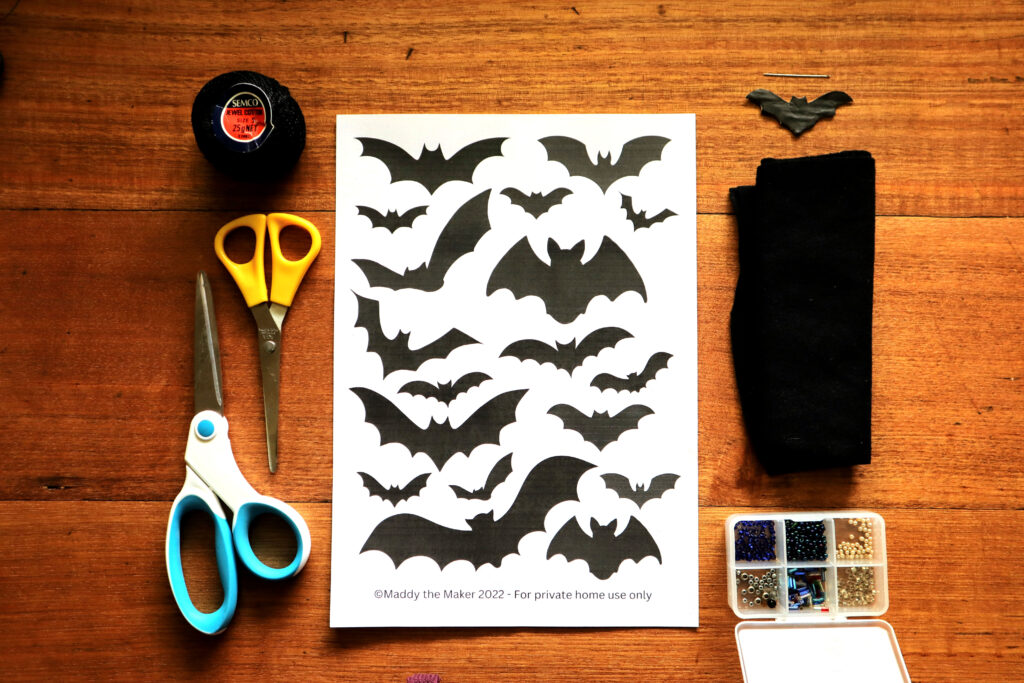
A printed copy of my free bat template printable
Small scrap of black wool felt, or paper, leather, cardstock etc
Approximately 4 metres/yards of cotton thread, string, wool, twine, thin ribbon, raffia etc + appropriately sized needle for threading
Approximately 50 seed beads, or other embellishments for the bat’s eyes (if using). Make sure that your beads will fit all the way over your threaded needle. If not, you may need to change needle and/or thread size. If they still won’t fit, you may need to consider another option for your batty eyeballs.
Small piece of recycled thick cardboard for making a durable reusable template
Paper/cardboard scissors
Fabric scissors (if using felt)
Fabric marking pencil (if using felt) or just a regular pencil if using paper or cardstock.
How to make a Sustainable Batty Halloween Garland
First print out a copy of my free bat template printable (shown above).
Pick which bat you want to use. I used the third up from the bottom on the right – but you should pick whichever is your favourite! You can also pick a few different bats, just try to stick to similarly sized bats.
Make the template for your Halloween Garland
Next, use your paper scissors to cut around the outside of the silhouette.
Trace your paper bat template onto a small scrap of recycled thick cardboard, then cut around the lines with paper/cardboard scissors. This will give you a more durable template for marking out your bats.
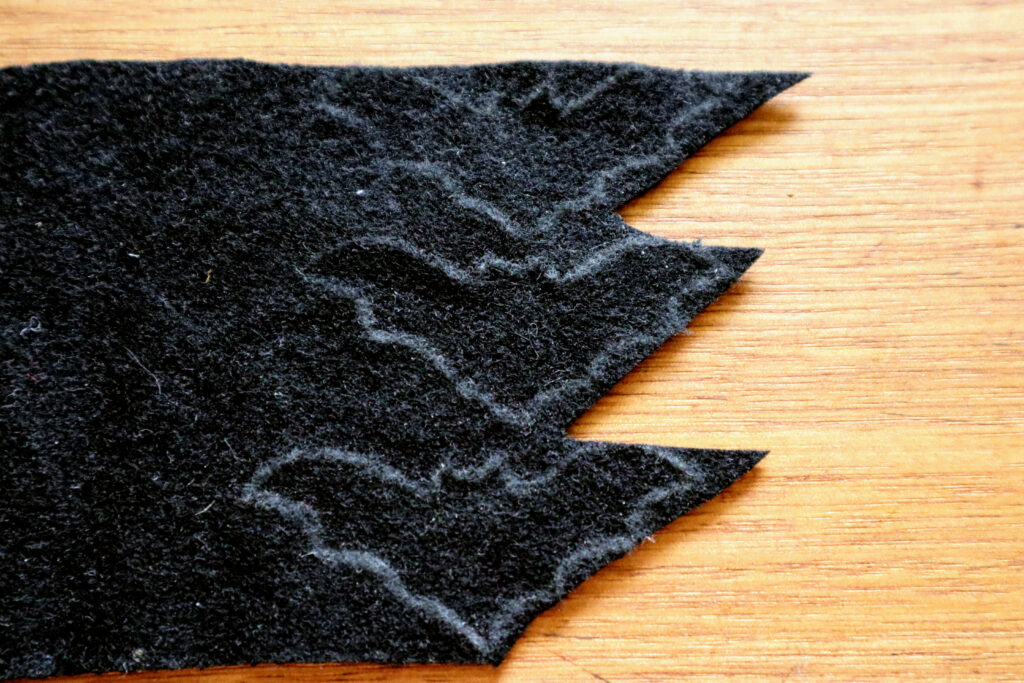
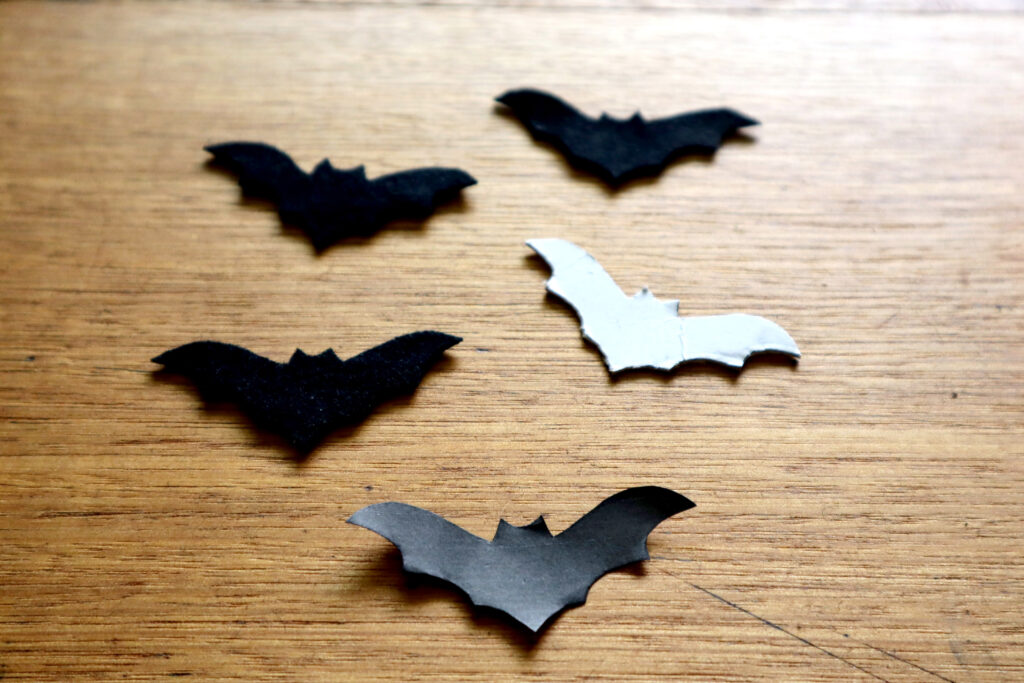
Trace and cut out the bats for your Sustainable Batty Halloween Garland
Once your cardboard template is ready, use a fabric marking pencil, tailors chalk, pen, pencil, etc to trace the bat shape repeatedly onto your felt, cardstock, leather etc. Try using a tessellating pattern to reduce waste.

Then cut out each felt bat using appropriate scissors for your chosen material.
If using non-felt bats, use a hole punch or other appropriate implement to create a hole for your threaing material in each of the bat’s wing tips. Just be careful not to make your holes too close to the edges.
I cut out 24 bats, but you can make your garland as long or short as you like. Using a different sized bat template will give you a different length, so if you make bigger bats, you will need to make less of them to cover the same distance.
You can work out how many bats you will need to cut out by using your threading material to measure the space where you plan to hang your garland. Don’t forget to drape your string/thread etc a bit, because a garland without any drape tends to look a bit strange!
Once you have this measurement, divide it by the wingspan of your chosen bat template to figure out how many bats you need to cut out.
Cut a piece of string/thread etc to the length you want your garland to be, PLUS an extra metre/yard on EACH end, to leave room for tying up.
Thread the bats to create your Sustainable Batty Halloween Garland
If you are not using felt bats, and have already created holes in your bats wingtips, you won’t necessarily need to use a needle. If your threading material is prone to fraying, you can use sticky tape to hold the end together and make it easier to thread.
If you are using non-felt bats with punched holes, ignore the following sewing instructions. Simply push your threading material down throught the hole in one wing tip, then back up through the other wing tip. Then repeat until all the bats are threaded.
Just make sure to leave a metre/yard at each end free for tying up.
How to sew your Sustainable Batty Halloween Garland
If you are planning to sew your garland, thread thread your needle with your thread, string etc. Use a needle threader if you have any difficulty.
Start threading your first bat
Add your first bat by bringing the needle down through the right wing tip
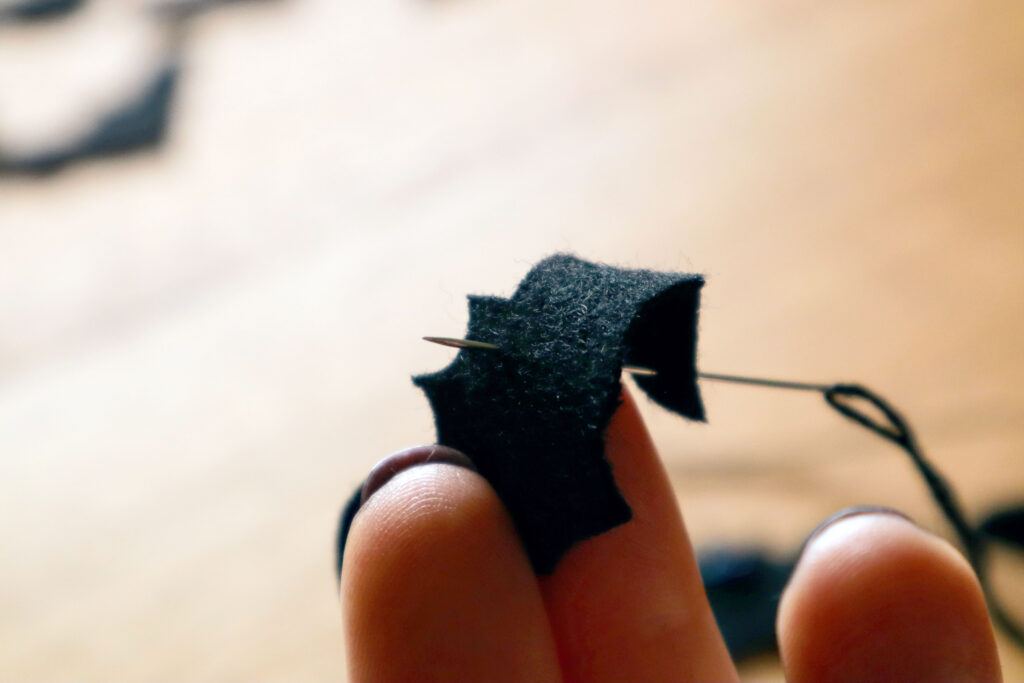
and bringing it back up where you want to place the bat’s left eye (this is to your right). You can mark your bat’s eye positions first to make it easier, I just went by sight as I was sewing along.
Pull the bat all the way down the string, until you are a metre/yard from the end (leaving room for tying up). Smooth out the wing so it’s not scrunched up.
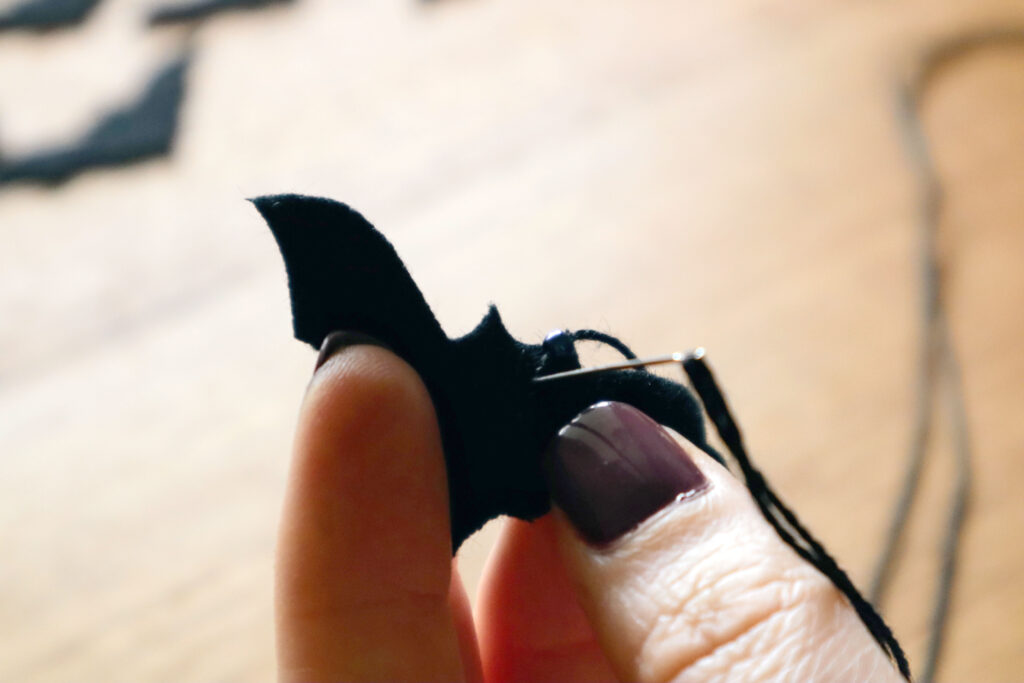
Add the bat’s eyes
Thread a seed bead (or whatever embellishment you’re using) over your needle and onto the thread. Then push the needle back down through the fabric, exactly where it came out at the left eye.
Pull the thread all the way through, forming the left eyeball.
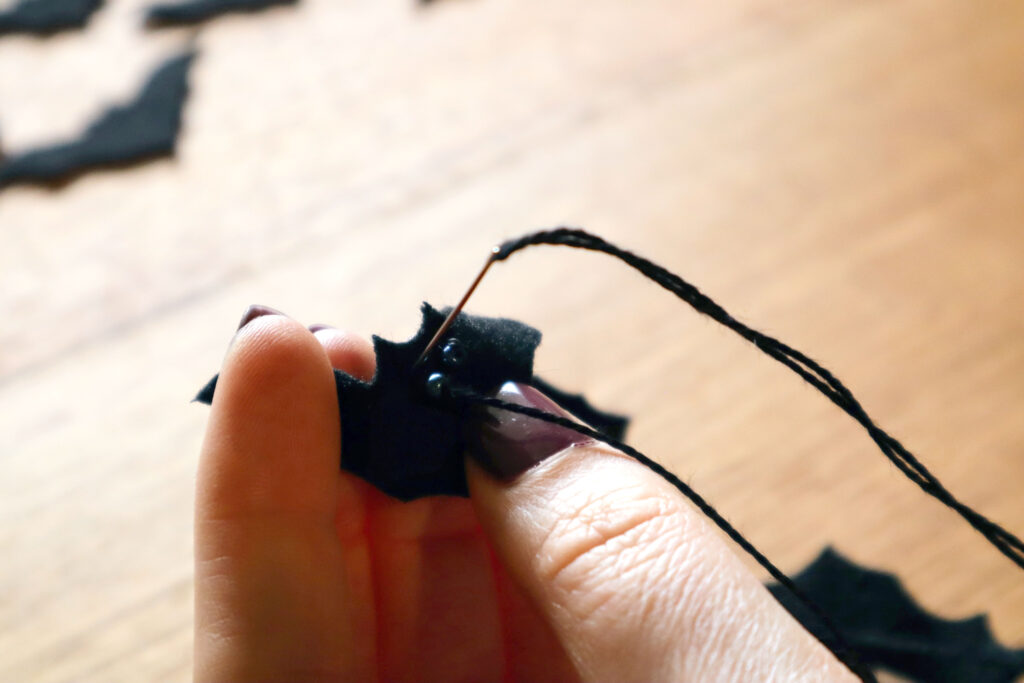
Next, push the needle back up through the felt, at the position of the right eyeball.
Pull another seed bead over the needle and onto the thread, then push the needle back down through the fabric where you just came up through the right eyeball.
Sometimes at this stage, the eyeballs need a little adjusting, feel free to wriggle them around.
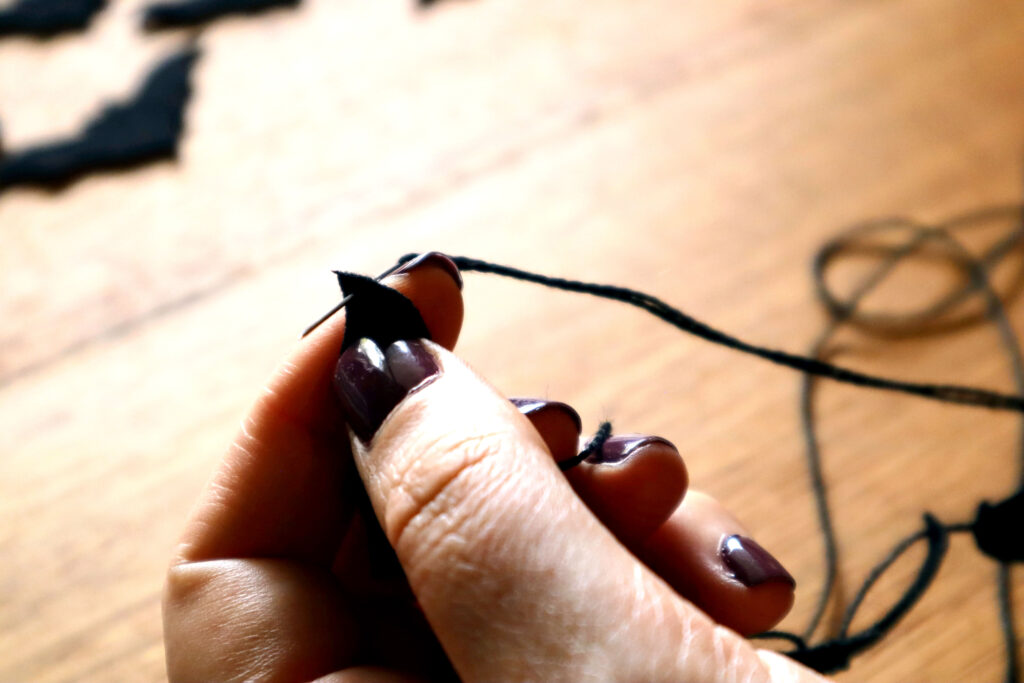
Finish threading the bat
The last stepis to finish off threading the bat, by bringing the needle back up through the left wing tip.
And that’s about it! Just keep going until all the bats have been added. Just make sure that you smooth out the wings and make sure your bats are spaced evenly, so the wing tips are just touching.
Time to hang your Sustainable Batty Halloween Garland!
If you have small nails or tacks in your mantlepiece etc, use those to hang your Halloween Garland. If you don’t have anything to hang it from and don’t want to use nails or tacks, you can always just use sticky tape, washi tape, or masking tape.
And that’s how you make a spookily sustainable Halloween bat garland! For more information on sustainable Halloween decorations, check out my ultimate guide to sustainable halloween decorations.
Would you try making a spookily sustainable bat garland?
If you do, I’d love to see it! Take a pic or two and tag me on Instagram @maddythemaker
Happy garland making!
[optin-monster-inline slug=”qdfs5cowsxbtmmucnrtm”]